Hardwood flooring has been popular over the years for its looks, durability, and stylish appeal, which suit every space. Nonetheless, as exhilarating as it may be to select the right type and finish for flooring, knowing how it is installed is just as important.
How your floor is installed will affect its long-term stability, comfort, and performance. Also, it affects a project’s budget, schedule, moisture, and aesthetic quality. For this reason, whether you are a DIY-er looking to get going on a home project or a homeowner preparing to hire someone, it can be valuable to get clarity on different installations.
In this article, you will take a closer look at the five most common methods of hardwood flooring installation, how they work, and where they work best. By learning every technique, you will be able to choose the technique you need confidently when you want.
1. Nail-Down Installation
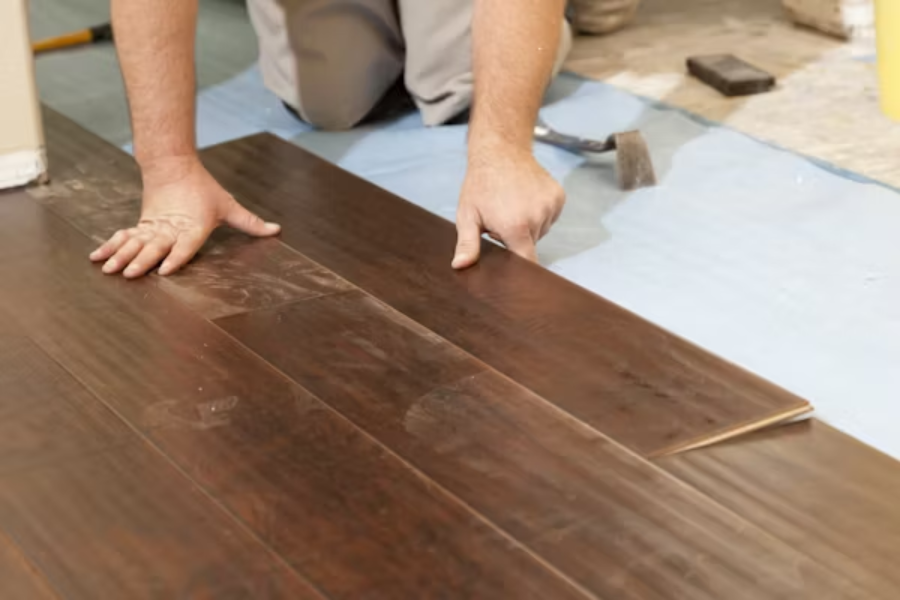
One of the oldest installation methods for hardwood flooring is the nail-down method. To fasten a floor, the planks need to be attached to a wooden subfloor with flooring nails or cleats.
Many people prefer this technique for solid hardwood boards since it provides a strong mechanical bond. Moreover, nail-down is ideal for above-grade applications, where moisture levels remain stable.
Additionally, this method provides a firm feel underfoot that most homeowners love. Although it is tough and will last a long time, it does take some skill. That is why experienced installers and professional flooring services often handle it.
For a home with an older wooden subfloor or for someone who wants a trustworthy method, a nail-down is still a favorite. Therefore, installation methods vary widely in complexity and application.
2. Staple-Down Installation
The staple-down method is like nail-down installation, but uses heavy staples instead of nails. The subtle change can speed up the process and make it easier for installers who like staple guns.
Thus, it is a popular choice for engineered hardwood flooring; however, it may also work well with some solid wood types. Besides convenience, the staple-down method provides a strong connection that prevents plank movement.
Still, it requires a wood subfloor, limiting its use in some situations. Homeowners who value efficiency still prefer this lifestyle, nevertheless. Some installers find it a more forgiving method, as staples hold tightly without the same risk of splitting wood as nails do.
3. Glue-Down Installation
The glue-down installation method uses a strong mastic or adhesive to glue every plank directly to the subfloor. This method can be particularly useful for engineered hardwood, which is more dimensionally stable than solid planks.
Glue-down installation is also possible over concrete. This makes it a good choice for basements or slab-on-grade houses. In addition, each board will feel solid and quiet underfoot because it is glued down. It effectively lowers the hollow sounds that floating floors can produce.
Due to the level of preparation and clean-up required for adhesive installation, it is advised for skilled DIYers or professionals. Even the type of glue used has to be chosen specifically to work with the floor and subfloor.
It is worth noting that academic studies support the benefits of engineered-floor installation. For instance, a 2023 study investigated the deformation of engineered wood flooring. This deformation can be influenced by the adhesive spreading rate and pressing parameters, which in turn affect flooring performance.
4. Floating Installation
A floating floor is not fastened to the subfloor at all. Instead, planks connect via tongue-and-groove or click-and-lock systems, allowing the entire floor to “float” above the underlayment.
So, if you are a homeowner in search of a quick, easy installation that can be done with very minimal tools, this is the method for you. Also, floating floors can be installed over a variety of subfloor materials, including concrete slabs, plywood, and even existing flooring.
Due to this versatility, it has become one of the most sought-after choices for contemporary engineered wood. The material under the flooring can help with sound reduction and some moisture control. While floating floors can be quite straightforward and flexible, some products may feel less solid underfoot.
This technique is consistent with building science. A 2022 study on the thermal performance of wood in radiant-heat systems noted that engineered wood performance is partly dependent on installation, and floating systems may be more compatible with variable loads.
5. Click-Lock Installation
Click-lock installation, a floating method, deserves its own description, as it is increasingly common and easy to use. The planks come with pre-milled locking mechanisms that fit together exceptionally well without glue, nails, or staples.
This method is popular with well-heeled DIY homeowners who like a clean, no-mess installation. Also, click-lock floors allow for simple disassembly. This is useful if any board gets damaged or if the floor needs to be relocated.
Due to their easy assembly, they are perfect for jobs when time is short or when space must remain usable during the installation. Even with its easy-click design, this floor is still incredibly durable and seamless in appearance.

Conclusion
The right hardwood flooring installation process is guided by the conditions in your home and your expectations over time. The five ways to install laminate flooring are nail-down, staple-down, glue-down, floating, and click-lock.
Each has its own advantages, disadvantages, and uses. Transitioning slowly from one to the other, you learned how each method enhances comfort and durability, and how it affects the fabric’s overall performance.
No matter how you want to install something, they will have a method available to achieve your objective or standard. Using this knowledge, you can make a confident, well-informed decision about your hardwood flooring that will enhance its beauty and lifespan for many years to come.